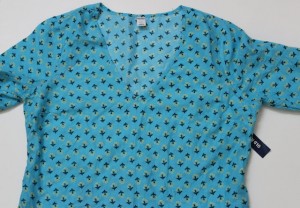
You probably have an outfit with a plunging neckline that is unsuitable for the workplace, or a shirt with buttons that start too far down the chest. Either way, there is a quick fix to this by using snaps, also known as ‘press button’, as a first button. This tutorial is so easy, you don’t need a sewing machine and you won’t have to go to the tailor’s again for something this easy. Here’s a guide on how to fix it.
Tools
Snap or Press button
Sewing needle
Matching thread
Outfit to be fixed
Scissors
Chalk
Steps
1. Lay your fabric flat on the table and mark the spot where you want the snap to be. A snap has two parts to be attached on either side of the fabric.
2. Mark the spot where you want the first part to be. Place the snap on the fabric and pin it. Using a needle that you have threaded, sew the snap onto the fabric.
Tip: Sew the snap by pushing the needle into a snap hole and bringing it out from another hole.
3. When you have sewn all snap holes to the fabric, cut off the thread leaving a few inches.
4. Make three knots on the loose thread to secure it and prevent the snap from coming loose.
5. Using chalk, mark the opposite side of the first snap. That is the exact opposite side of the second side of your neckline. Placing the second snap button here will ensure that both buttons click when you press them together.
6. Repeat steps 2-4 to sew the snap button onto the second side of the fabric.
7. Test your outfit to see if the snap buttons are placed properly.
There you have it! A simple, easy and quick way to make adjustments to the plunging neckline of your dress or shirt.
About the Author: Amina Salau is a writer and editor running The Illuminated Pen. You can find her online at www.theilluminatedpen.com and on Twitter (@_Aminah)